Your go-to guide for foundational woodworking techniques and DIY projects.

Tuesday, November 19, 2024

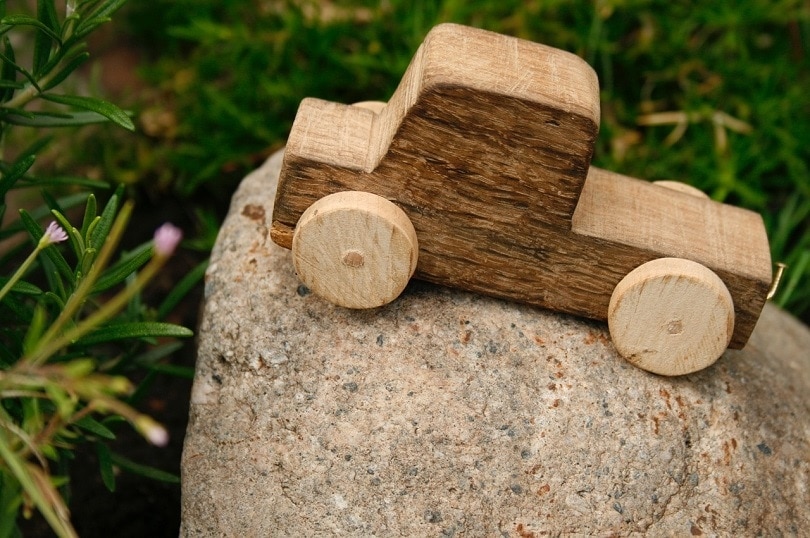
How to Make and Sell Wooden Toys with a High-End, Artistic Design

How to Make and Sell Wooden Toys with a High-End, Artistic Design

Crafting and Selling High-End, Artistic Wooden Toys

In a world increasingly dominated by mass-produced, plastic toys, there's a growing appreciation for handcrafted wooden toys with unique, artistic designs. These toys not only provide imaginative play but also serve as beautiful decorative pieces, appealing to parents seeking quality, sustainability, and a touch of artistry for their children. This article will guide you through the process of making and selling high-end, artistic wooden toys, from design to marketing.

I. Designing Artistic Wooden Toys

The heart of your success lies in crafting distinctive designs that capture the imagination and resonate with your target audience. This requires a blend of creativity, skill, and market understanding.

1. Defining Your Niche

Before diving into design, identify your target market. Are you aiming for infants, toddlers, or older children? Do you specialize in educational toys, imaginative playthings, or something else entirely? Narrowing your focus allows you to tailor designs and marketing efforts effectively.

2. Exploring Inspiration

Seek inspiration from a variety of sources:

  • Art and Design: Explore contemporary and traditional art movements, paying attention to form, color, and texture.
  • Nature: Observe the intricate details of natural elements, from flowing lines to geometric patterns.
  • Children's Literature and Play: Analyze classic children's books, films, and games for themes and motifs that resonate with children.
  • 3. Developing Unique Concepts

    Once inspired, begin sketching and experimenting with ideas.

  • Simplicity: Start with basic forms and gradually introduce complexity.
  • Functionality: Ensure your designs are not just visually appealing but also functional and engaging for children.
  • Safety: Prioritize child safety by using non-toxic materials, smooth edges, and avoiding small parts that could be a choking hazard.
  • II. Crafting Wooden Toys with High-End Quality

    High-end wooden toys are defined by meticulous craftsmanship and premium materials. Your attention to detail will be evident in every step of the process.

    1. Selecting Wood Species

    Choose wood species known for their durability, strength, and aesthetic appeal.

  • Hardwoods: Maple, cherry, walnut, and oak offer excellent durability, beautiful grain patterns, and natural resistance to wear and tear.
  • Softwoods: Pine and cedar are lighter and easier to work with, suitable for intricate carvings and whimsical designs.
  • 2. Precise Cutting and Shaping

    Accurate cutting and shaping are crucial for both structural integrity and visual appeal. Invest in quality woodworking tools and techniques:

  • Hand Tools: Chisels, planes, and saws provide control and detail for intricate work.
  • Power Tools: Table saws, band saws, and routers can be used for efficient cutting and shaping.
  • Templates: Use templates to ensure consistent and accurate designs across multiple toys.
  • 3. Finishing Techniques

    The finishing touches give your wooden toys their unique character and longevity. Consider:

  • Sanding: Smooth surfaces to create a comfortable and safe finish for children.
  • Natural Finishes: Use non-toxic oils (walnut oil, tung oil) or waxes to enhance the wood's natural beauty and provide protection.
  • Paints and Stains: Choose water-based, non-toxic paints or stains for vibrant colors and durability.
  • III. Marketing and Selling High-End Wooden Toys

    Once you have crafted exceptional toys, you need to effectively reach your target market and showcase their artistry and value.

    1. Building a Strong Brand Identity

    Develop a cohesive brand identity that reflects the quality and artistry of your wooden toys:

  • Brand Name: Choose a name that is memorable, evokes your brand's essence, and aligns with your target audience.
  • Logo: Create a visually appealing logo that represents your brand and its values.
  • Website: A professional website is essential for showcasing your products, telling your brand story, and providing customer service.
  • 2. Highlighting the Unique Selling Proposition

    Clearly communicate what makes your wooden toys stand out:

  • Artisanal Craftsmanship: Emphasize the handcrafted nature and meticulous attention to detail.
  • High-Quality Materials: Highlight the use of sustainable and safe wood species.
  • Artistic Design: Showcase the unique aesthetic appeal and design inspiration behind your toys.
  • Educational Value: If applicable, emphasize the educational benefits of your toys.
  • 3. Choosing the Right Sales Channels

    Reach your target audience through a variety of channels:

  • Online Marketplaces: Etsy, Amazon Handmade, and specialized toy websites can provide a wide reach.
  • Social Media: Instagram, Facebook, and Pinterest are great for showcasing your toys and building a community.
  • Local Boutiques and Craft Shows: Participate in local events and collaborate with retailers who align with your brand values.
  • 4. Pricing Strategies

    Price your toys fairly, reflecting their quality, design, and the time invested in their creation.

  • Cost-Plus Pricing: Calculate the cost of materials, labor, and overhead, and add a markup to determine the price.
  • Value-Based Pricing: Consider the perceived value of your toys to your target market, emphasizing their unique features and benefits.
  • Competitive Analysis: Research the prices of similar toys in the market to ensure your pricing is competitive and attractive.
  • IV. Building a Sustainable Business

    Sustaining success in the long term requires a focus on both financial and environmental sustainability.

    1. Inventory Management

    Avoid overstocking and maintain a balanced inventory to minimize waste and financial risk.

  • Pre-Orders: Encourage pre-orders to ensure demand before production.
  • Limited Editions: Introduce limited edition designs to create exclusivity and manage inventory.
  • 2. Sustainable Practices

    Minimize your environmental impact by:

  • Source Wood Responsibly: Choose wood from sustainable forestry practices or reclaimed wood sources.
  • Reduce Waste: Utilize wood scraps for smaller projects or donate them to local artists or makers.
  • Eco-Friendly Packaging: Use recycled and biodegradable packaging materials to minimize your carbon footprint.
  • 3. Customer Service and Brand Building

    Focus on providing excellent customer service to build trust and loyalty:

  • Responsive Communication: Answer inquiries promptly and provide detailed information about your products.
  • Personalized Touches: Add handwritten notes or small gifts to create a positive customer experience.
  • Community Engagement: Connect with customers on social media, host workshops, or collaborate with other makers to build a community around your brand.
  • Creating and selling high-end, artistic wooden toys is a rewarding journey that combines craftsmanship, creativity, and a commitment to quality. By focusing on design, quality, marketing, and sustainability, you can build a successful business that brings joy and beauty into the lives of children and their families.

    Share:

    Monday, November 18, 2024

    Trending Wood Sign Styles for Every Season

    Trending Wood Sign Styles for Every Season

    Trending Wood Sign Styles for Every Season

    Wood signs are a timeless and versatile way to add a touch of personality and charm to any space. From farmhouse chic to modern minimalist, there's a wood sign style for every taste and occasion. And with the changing seasons, it's always fun to refresh your decor with new and trending wood sign designs. So, let's dive into the hottest wood sign styles for each season!

    Spring: Blooming with Freshness

    Spring is all about new beginnings, vibrant colors, and celebrating nature's awakening. Wood signs reflect this cheerful energy with themes like:

    Floral Delights

    Embrace the beauty of blooming flowers with signs featuring delicate florals, botanical illustrations, or whimsical floral arrangements. Think pastel hues, delicate calligraphy, and a touch of vintage charm. You can go for a classic floral pattern or get a little more abstract with a watercolor style for a modern twist.

    Welcome Spring

    What better way to usher in the new season than with a warm welcome sign? These signs can feature simple yet elegant typography, welcoming messages like "Welcome Spring" or "Hello Sunshine," or even playful quotes about the season's joy. Look for rustic wood signs with distressed paint or classic whitewashed designs for a charming touch.

    Farmhouse Charm

    Farmhouse style is a perennial favorite, and spring is the perfect time to embrace its cozy and rustic appeal. Opt for signs with floral wreaths, chicken silhouettes, or simple "Welcome" messages in farmhouse fonts. These signs often have a distressed finish and can be adorned with natural elements like twine or burlap.

    Summer: Sun-Kissed and Breezy

    Summer brings a sense of fun, freedom, and endless possibilities. Wood signs capture this spirit with themes that evoke warm days, beachy vibes, and carefree moments.

    Beachy Bliss

    Beach-themed signs are a classic summer choice, and the options are endless! From nautical symbols like anchors and seashells to coastal landscapes and seascape scenes, there's something for every beach lover. Consider signs with bright colors, nautical rope accents, or even driftwood finishes for an authentic touch.

    BBQ & Gatherings

    Summer is all about outdoor gatherings and delicious barbeques. Wood signs with playful messages like "Let's Eat" or "Good Times & BBQ" add a touch of humor and fun to your backyard decor. They can also feature whimsical graphics of grilling tools or delicious food items.

    Vacation Vibes

    Summer is the season for escaping to new destinations. Wood signs with vacation-inspired quotes or travel-related graphics are perfect for adding a touch of wanderlust to your home. Think signs with world maps, inspirational travel quotes, or whimsical airplane designs.

    Autumn: Warm and Cozy

    Autumn is a season of transformation, with nature's palette shifting to warm reds, oranges, and yellows. Wood signs reflect this cozy and inviting vibe with themes that evoke the beauty of the changing season.

    Fall Foliage

    Leaves are the stars of autumn, and wood signs featuring autumn foliage in various shades are a popular choice. They can be painted in realistic detail or presented in a more stylized, abstract way. Think of rustic wood signs with a weathered finish for a natural touch.

    Pumpkin Spice Everything

    Pumpkin spice is synonymous with autumn, and it's even made its way to wood signs! Look for signs with adorable pumpkin designs, cute sayings like "Pumpkin Spice & Everything Nice," or even detailed images of pumpkin lattes or pies. These signs often feature warm, earthy tones like orange, brown, and cream.

    Welcome Fall

    Autumn is a season for cozying up at home. Wood signs with welcoming messages like "Welcome Fall" or "Autumn Blessings" create a warm and inviting atmosphere. Look for signs with simple typography and rustic details like burlap or twine accents.

    Winter: Festive and Joyful

    Winter is a magical time filled with cozy evenings, twinkling lights, and holiday cheer. Wood signs bring this festive spirit to life with themes that celebrate the season's beauty.

    Holiday Cheer

    Winter is synonymous with the holiday season, and wood signs are perfect for spreading festive cheer. Look for signs with classic holiday themes like snowflakes, reindeer, Santa, or even traditional Christmas wreaths. Consider using warm colors like red, green, and gold for a traditional holiday feel.

    Winter Wonderland

    Winter is a season of snow and ice, and wood signs with winter wonderland scenes capture the magic of the season. Look for signs with elegant snowflakes, intricate ice crystals, or charming winter landscapes. Consider a whitewashed or distressed finish for a touch of rustic charm.

    Cozy Comfort

    Winter is all about cozying up indoors. Wood signs with inspirational quotes about warmth, comfort, or family gatherings are perfect for creating a welcoming and comforting atmosphere. Look for signs with simple typography and rustic details like burlap or twine accents.

    Beyond the Seasons

    Of course, you don't have to stick to seasonal themes! There are countless other wood sign styles you can embrace year-round. Here are a few of our favorites:

    Farmhouse Chic

    Farmhouse style is all about rustic charm and simple elegance. Look for signs with distressed paint, weathered wood finishes, and charming typography. They often feature quotes about family, home, or country living.

    Modern Minimalism

    For a sleek and contemporary look, opt for wood signs with minimalist designs. These signs often feature simple typography, geometric shapes, or abstract patterns in muted tones. They can be made from reclaimed wood or painted in a solid color for a clean and modern look.

    Rustic Elegance

    Embrace the beauty of nature with rustic wood signs featuring natural elements like branches, bark, or stones. These signs often have a weathered finish and can be adorned with natural elements like twine, burlap, or dried flowers. They are perfect for adding a touch of organic beauty to your space.

    Crafting Your Own

    If you're feeling creative, you can even craft your own wood signs! There are endless possibilities for DIY wood sign projects. You can use pre-made wood blanks or create your own from reclaimed wood. Then, let your imagination run wild with paint, stencils, and other decorative elements.

    Commonly Asked Questions

    Where can I find trendy wood signs?

    You can find trendy wood signs in a variety of places:

  • Online Marketplaces: Etsy, Amazon Handmade, and Shopify are great places to find unique and handmade wood signs.
  • Local Craft Fairs: Many local craft fairs and farmers markets feature artisans selling handmade wood signs.
  • Specialty Stores: Look for wood signs at home decor stores, gift shops, and antique stores.
  • What are some popular wood sign materials?

    Wood signs come in a variety of materials, including:

  • Reclaimed Wood: Adds a rustic and eco-friendly touch.
  • Pine: Affordable and easy to work with.
  • Oak: Strong and durable.
  • MDF (Medium-Density Fiberboard): Lightweight and smooth.
  • How do I care for my wood sign?

    To keep your wood sign looking its best:

  • Dust it regularly with a soft cloth.
  • Avoid placing it in direct sunlight or near heat sources.
  • If necessary, clean it with a damp cloth and mild soap.
  • Apply a sealant if desired to protect it from moisture and scratches.
  • Wood signs are a fantastic way to add personality and charm to your home. Whether you embrace the latest seasonal trends or create your own custom designs, wood signs are a fun and easy way to express your style and create a space that feels truly unique. So, go ahead, get inspired, and find the perfect wood signs to make your home feel like a warm and welcoming haven.

    Share:

    Wednesday, November 13, 2024

    How to Paint and Decorate Wooden Christmas Ornaments

    How to Paint and Decorate Wooden Christmas Ornaments

    A Comprehensive Guide to Painting and Decorating Wooden Christmas Ornaments

    Wooden Christmas ornaments offer a blank canvas for creativity, allowing you to personalize your holiday décor with unique designs and festive colors. Whether you're a seasoned crafter or a beginner, painting and decorating wooden ornaments is an enjoyable and rewarding activity. This comprehensive guide will walk you through the essential steps, from choosing the right supplies to applying intricate details, ensuring you create beautiful and cherished ornaments for your holiday tree.

    Choosing Your Supplies

    Before embarking on your creative journey, gather the necessary supplies to ensure a smooth and enjoyable crafting experience. Here's a checklist of essentials:

    Wooden Ornaments

    The foundation of your ornaments lies in the choice of wooden blanks. Consider the size, shape, and thickness that best suit your project. Round, heart, star, or even whimsical shapes are readily available. Opt for smooth, sanded wooden ornaments for optimal paint adhesion and a polished finish.

    Paint

    Select acrylic paints as they are versatile, quick-drying, and offer a wide range of colors. For intricate details and fine lines, acrylic craft paints are ideal. If you prefer a glossy finish, choose acrylic paints formulated for a high gloss effect. Alternatively, consider using enamel paints for a durable and long-lasting finish.

    Brushes

    Invest in a variety of paintbrushes with different sizes and shapes to accommodate varying details. Flat brushes are excellent for covering large areas, while round brushes excel in creating fine lines and details. For intricate designs, consider using detail brushes or liners with fine tips.

    Primer

    Applying a primer before painting is crucial, especially for raw wood surfaces. Primer provides a smooth and even base for the paint, promoting better adhesion and preventing the wood's natural grain from showing through.

    Sealer

    Once your ornaments are painted and decorated, a sealant will protect your artwork from scratches, water damage, and fading. Use a water-based acrylic sealant for a glossy finish or a matte sealant for a more subdued look.

    Additional Supplies

    • Scissors for trimming embellishments
    • Glue for securing embellishments
    • Twine or ribbon for hanging
    • Glitter, sequins, and other embellishments for adding sparkle and texture
    • Stencils for creating patterns and designs
    • Craft knife for precise cuts
    • Paint palette for mixing colors
    • Paper towels for cleaning brushes
    • Protective gloves to keep your hands clean

    Preparing the Ornaments

    Before applying paint, prepare your wooden ornaments to ensure optimal results and prevent imperfections. Here's a step-by-step guide:

    Cleaning

    Begin by wiping the ornaments with a damp cloth to remove any dust or debris. Let them dry completely before proceeding.

    Priming

    Apply a thin and even layer of primer to all surfaces of the ornament. Use a small brush to reach corners and crevices. Allow the primer to dry completely according to the manufacturer's instructions.

    Sanding (Optional)

    For a smoother finish, you can sand the primed ornaments lightly with fine-grit sandpaper. This step removes any imperfections and creates a more uniform surface for painting.

    Painting the Ornaments

    With the ornaments prepped and ready, it's time to unleash your creativity and bring your visions to life. Here are some techniques and tips for painting your ornaments:

    Base Coat

    Begin by applying a base coat of your chosen color to all surfaces of the ornament. Use light, even strokes to avoid streaks. Allow the base coat to dry completely before applying any subsequent layers or designs.

    Adding Patterns and Designs

    • Freehand painting: Unleash your artistic flair and paint directly onto the ornaments with brushes of various sizes.
    • Stenciling: Choose stencils with festive designs or create your own. Secure the stencil onto the ornament with painter's tape and apply paint over the openings.
    • Sponging: Use a sponge to create textured patterns or to apply paint in a distressed style.
    • Stamping: Use craft stamps with various shapes and designs to create repetitive patterns or add unique elements.

    Layering and Detailing

    Once the base coat is dry, you can add layers of color, details, and embellishments. Allow each layer to dry completely before applying the next to avoid smudging. Use fine-tipped brushes for intricate details and outlining.

    Finishing Touches

    After adding all your designs and details, consider adding a finishing touch for extra sparkle or dimension. You can sprinkle glitter, glue sequins, or use other embellishments to personalize your ornaments.

    Securing and Finishing

    With your painted ornaments complete, it's time to secure them and add a finishing touch to protect your hard work. Here are the final steps:

    Sealing

    Apply a sealant to the finished ornaments to protect the paint and prevent fading. Use a sealant specifically designed for acrylic paints and apply it evenly with a brush. Allow the sealant to dry completely before handling.

    Attaching Hangers

    Choose a hanging method that suits your style. You can drill a small hole at the top of the ornament and thread a ribbon or twine through it. Alternatively, glue a small loop of ribbon or twine to the top of the ornament.

    Storage and Care

    To ensure your ornaments last for years to come, follow these storage and care tips:

    Storage

    Store your finished ornaments in a cool, dry place away from direct sunlight. Protect them from dust and moisture by placing them in a storage container or box.

    Cleaning

    Gently wipe off any dust or grime with a soft cloth. Avoid using harsh cleaners or abrasive materials that could damage the paint.

    Creative Inspiration

    Embrace your creativity and explore a variety of decorative ideas for your wooden ornaments:

    Festive Themes

    Consider incorporating festive themes like snowflakes, reindeer, Santa Claus, snowmen, or Christmas trees. Use bold colors like red, green, white, gold, and silver to create a truly festive look.

    Nature-Inspired Designs

    Bring the beauty of nature indoors with designs featuring pine cones, holly berries, or winter scenes. Use muted shades of green, brown, and white to create a rustic and charming feel.

    Personal Touches

    Add personal touches to your ornaments by incorporating initials, names, dates, or special messages. Use metallic paints or embellishments to make your ornaments truly unique.

    Conclusion

    Painting and decorating wooden Christmas ornaments is a wonderful way to add a personal touch to your holiday décor. From classic designs to modern trends, the possibilities are endless. With the right supplies, techniques, and a little creativity, you can create beautiful and cherished ornaments that will bring joy to your family and friends for years to come.

    Share:

    Woodworking Projects Perfect for Small Spaces

    Woodworking Projects Perfect for Small Spaces

    Woodworking Projects Perfect for Small Spaces

    Hey there, fellow woodworkers! You know the feeling â€" you're itching to get your hands on some wood and create something amazing, but your space is, well, *cozy*. Don't let a lack of square footage stop you from flexing your woodworking muscles! This guide is packed with woodworking project ideas that are perfect for small spaces, whether you're a beginner or a seasoned pro.

    Small But Mighty: Projects That Pack a Punch

    Let's face it, sometimes the most rewarding projects are the ones that maximize function and style in a limited space. Here are a few ideas that are perfect for small spaces:

    1. Spice Up Your Kitchen With a Compact Spice Rack

    Tired of your spices cluttering up your cabinets? A compact spice rack is the perfect solution! This project can be made from a variety of materials, like reclaimed wood or even repurposed metal. Get creative with the design â€" add small hooks for utensils, or even a chalkboard for jotting down recipe ideas.

    2. Elevate Your Organization Game with a Wall-Mounted Shelf

    Wall-mounted shelves are a space-saving wonder! You can make them narrow and long to fit above your desk, or create a unique and decorative shape to hold your favorite books or plants. Use reclaimed wood or even bamboo for a natural vibe.

    3. Craft a Cozy Corner With a Book Nook

    Who doesn't love a cozy corner to curl up with a good book? A DIY book nook is a great way to create a personal reading retreat in your small space. You can use wood scraps to construct a simple and functional shelf, or go all out with a built-in nook complete with a comfortable cushion and reading light.

    4. Transform Your Walls with Unique Wall Art

    Wall art is a great way to add personality to your space without taking up valuable floor space. Try your hand at creating a wooden wall hanging, a geometric design, or even a custom-made picture frame.

    5. Add a Touch of Charm with Decorative Boxes

    Small wooden boxes are versatile and can be used to store everything from jewelry to craft supplies. You can find inspiration online for endless design ideas â€" think geometric shapes, whimsical designs, or even personalized engravings. These little beauties are a perfect way to add a touch of personality to your space.

    Beyond the Basics: Projects for the Ambitious Woodworker

    If you're feeling confident in your woodworking skills, here are a few more ambitious projects that are still well-suited for smaller spaces:

    1. Create a Work-of-Art with a Desk Organizer

    For those who work from home, a custom-made desk organizer can be a real game-changer. You can design it to fit your specific needs, with compartments for pens, pencils, paper, and more. The possibilities are endless!

    2. Transform Your Space with a Built-in Bench

    A built-in bench is a great way to add seating and storage to a small space. You can make it a simple bench or go all out with a cushioned seat and built-in shelves for storing blankets or books. This project may require some more advanced woodworking skills, but the results are well worth it!

    3. Upcycle Furniture for a Unique Look

    Don't underestimate the power of upcycling! You can give old furniture a new lease on life by adding a fresh coat of paint, changing the hardware, or even adding a custom-built top or base. This is a great way to create unique and personalized pieces for your home without breaking the bank.

    Space-Saving Tips for Your Woodworking Projects

    Even with the right project, making the most of your space is key. Here are a few tips to help you maximize your woodworking experience in a small space:

    1. Think Vertical!

    Don't be afraid to go vertical with your storage solutions. Use wall-mounted shelves, pegboards, and vertical organizers to keep your tools and materials easily accessible and off the floor.

    2. Embrace Multifunctionality

    Look for furniture pieces that can serve multiple purposes. For example, a coffee table can double as storage, or a desk can transform into a dining table. Being creative with your furniture choices can save a lot of space!

    3. Keep It Clean and Organized

    A clean and organized workspace is essential for a small space. Take the time to put everything away after each project, and declutter regularly to prevent clutter from taking over.

    Final Thoughts

    Remember, woodworking is about creating something beautiful and functional, no matter the size of your space. Don't let limited square footage hold you back! With the right project ideas, some clever organization, and a whole lot of creativity, you can create amazing woodworking projects even in a small space. Happy woodworking!

    Share:

    Easy Woodworking Gift Projects: Perfect for Beginners

    Easy Woodworking Gift Projects: Perfect for Beginners

    Easy Woodworking Gift Projects: Perfect for Beginners

    Hey there, woodworking enthusiasts! Are you looking for some fun and rewarding projects to tackle, especially if you're just starting out? Look no further! I'm here to share some **easy woodworking gift projects** that are perfect for beginners and will impress your loved ones with your newfound skills.

    Let's face it, nothing beats the satisfaction of crafting something with your own hands, and giving it as a gift adds an extra layer of meaning and love. These projects are designed to be simple, achievable, and require minimal tools, making them ideal for budding woodworkers.

    Simple and Stunning Coasters

    Let's start with a classic â€" coasters! They're small, practical, and perfect for showcasing your woodworking skills. Plus, you can make a set of four to give as a thoughtful gift.

    What You'll Need:

    • Scrap wood (hardwood is preferred, but softwood will work too)
    • Saw (hand saw, miter saw, or circular saw)
    • Sandpaper (various grits)
    • Wood glue
    • Finishing oil or sealant (optional)

    Steps:

    1. Cut your wood into squares or circles, about 4 inches in diameter. You can use a jig saw for curves or a miter saw for squares.
    2. Sand the edges of your coasters smooth, starting with a coarse grit and gradually moving to a finer grit. Aim for a consistent finish.
    3. Apply a thin layer of wood glue to the bottom of each coaster, making sure to distribute it evenly.
    4. Place a piece of cork or felt on the bottom of each coaster to prevent scratching surfaces. Let the glue dry completely.
    5. Optional: Apply a finish of your choice, such as wood oil, varnish, or sealant, to enhance the wood's natural beauty and protect it from spills.

    And voila! Your coasters are ready to protect surfaces and impress your gift recipients. You can personalize them further by adding engravings, burning designs, or painting them.

    Charming Wooden Utensil Holder

    A utensil holder is a practical and stylish addition to any kitchen. This project involves basic cuts and some assembly, allowing you to learn about wood joinery.

    What You'll Need:

    • Wood boards (1/2 inch thick, approximately 6 inches wide and 12 inches long)
    • Saw (hand saw, miter saw, or circular saw)
    • Wood glue
    • Clamps
    • Sandpaper
    • Finishing oil or sealant (optional)

    Steps:

    1. Cut two pieces of wood for the sides, each about 6 inches wide and 4 inches high. Cut two more pieces for the front and back, each about 6 inches long and 4 inches high.
    2. Sand all edges of the wood pieces to ensure smooth surfaces.
    3. Use wood glue to join the sides to the front and back pieces, creating a rectangular box shape. Clamp the pieces together and let the glue dry completely.
    4. Optional: Add a decorative top to the utensil holder by cutting a piece of wood to fit the opening. Glue it in place and let it dry.
    5. Sand any rough edges, and apply a finish of your choice, if desired.

    Your utensil holder is ready to keep utensils organized and add a touch of rustic charm to the kitchen. Consider using different wood types for a contrasting and visually appealing look.

    Rustic Wooden Picture Frame

    A handmade wooden picture frame is a unique and sentimental gift. It's a perfect way to showcase a cherished photo or artwork.

    What You'll Need:

    • Wood strips (about 1 inch wide and 1/2 inch thick, lengths depending on picture size)
    • Saw (hand saw, miter saw, or circular saw)
    • Miter box and saw (optional, for precise angled cuts)
    • Wood glue
    • Clamps
    • Sandpaper
    • Finishing oil or sealant (optional)
    • Picture glass (optional, for protection)
    • Picture hanger or sawtooth hanger

    Steps:

    1. Measure the dimensions of your picture and add about 1/2 inch to each side for the frame. Cut four wood strips to these dimensions.
    2. Use a miter saw or a miter box and saw to cut the ends of the strips at 45-degree angles. This will create a smooth corner join.
    3. Apply wood glue to the ends of the strips and carefully join them together to form a rectangular frame. Clamp the pieces securely and let the glue dry.
    4. Sand the entire frame smooth and remove any glue residue.
    5. Optional: Apply a finish of your choice, such as wood oil, varnish, or paint, to enhance the look and protect the wood.
    6. Attach a picture hanger or sawtooth hanger to the back of the frame.
    7. If using glass, cut a piece to fit the picture size and secure it to the frame with glazing points.
    8. Place your picture inside the frame, and your gift is ready to impress!

    You can personalize the frame by adding decorative elements like wood carvings, paint details, or even using salvaged wood for a unique rustic look.

    Beyond the Basics: Expanding Your Skills

    Once you've mastered these basic projects, you can venture into more complex woodworking tasks. Here are some ideas for expanding your skills:

    • Learn about different wood types and their characteristics: Explore hardwoods like oak, maple, and cherry for durability and beautiful grains, or softwoods like pine and cedar for their affordability and ease of working with.
    • Try different woodworking techniques: Explore hand tools like chisels, planes, and gouges, or power tools like routers, table saws, and lathes.
    • Experiment with finishes: Use wood stains, paints, varnishes, and waxes to create different looks and protect your projects.
    • Join a woodworking community: Find local workshops, classes, or online forums to connect with fellow woodworkers and learn from their experience.

    Woodworking is a rewarding and creative hobby that can bring joy and satisfaction. With a little practice and patience, you'll be amazed at the beautiful and useful objects you can create. So, grab your tools, choose a project, and let your creativity flow! Happy woodworking!

    Share:

    Build These Stylish Wood Projects in One Afternoon

    Build These Stylish Wood Projects in One Afternoon

    Build These Stylish Wood Projects in One Afternoon

    Looking to add some charm and character to your home without breaking the bank? You don't need to be a seasoned woodworker to create stunning pieces that will elevate your space. With a few basic tools and some creativity, you can build these stylish wood projects in just one afternoon!

    Rustic Wooden Wall Shelf

    This project is perfect for beginners and requires minimal tools. You can customize it with your favorite wood type and add a touch of personality with decorative hardware. Here's what you'll need:

    • Wooden boards (1x6 or 1x8)
    • Wood stain or paint (optional)
    • Screws and brackets
    • Measuring tape
    • Saw
    • Drill
    • Level

    Instructions:

    1. Cut your boards to the desired length.
    2. Sand the edges and surfaces for a smooth finish.
    3. Apply stain or paint (optional).
    4. Attach brackets to the back of the shelf.
    5. Use a level to ensure the shelf is straight before mounting it to the wall.

    To make your shelf even more unique, you can add decorative elements like rope, metal accents, or wood carvings.

    Modern Wooden Planter Box

    Add a touch of greenery and modern style to your home with a simple wooden planter box. You can build it to fit any space and choose a wood type that complements your decor. This project is ideal for showcasing your favorite houseplants or creating a small herb garden.

    • Wooden boards (1x12 or 1x10)
    • Wood stain or paint (optional)
    • Wood glue
    • Screws
    • Measuring tape
    • Saw
    • Drill
    • Clamps (optional)

    Instructions:

    1. Cut your boards to the desired size for the planter box.
    2. Sand the edges and surfaces for a smooth finish.
    3. Apply stain or paint (optional).
    4. Assemble the box by gluing and screwing the sides together.
    5. Use clamps to secure the joints while the glue dries (optional).

    For a more polished look, you can add a decorative trim to the top or bottom edge of the planter box.

    Rustic Wooden Coat Rack

    A rustic coat rack is a functional and stylish addition to any entryway or mudroom. This project is perfect for displaying coats, hats, and scarves while adding a touch of warmth and personality to your space. Here's what you'll need:

    • Wooden branch (approximately 3-4 feet long)
    • Wood stain or paint (optional)
    • Screws and brackets
    • Measuring tape
    • Saw
    • Drill
    • Level

    Instructions:

    1. Trim the branch to the desired length.
    2. Sand the branch to remove any rough edges.
    3. Apply stain or paint (optional).
    4. Attach brackets to the back of the branch.
    5. Use a level to ensure the rack is straight before mounting it to the wall.

    For added flair, you can incorporate decorative elements like reclaimed metal hooks or fabric straps.

    These simple wood projects are a great way to add a touch of handmade charm to your home. With a little time and effort, you can create beautiful pieces that will be cherished for years to come. Remember to choose wood types and finishes that reflect your style and personality, and don't be afraid to experiment with different designs!

    Share:

    Tuesday, November 12, 2024

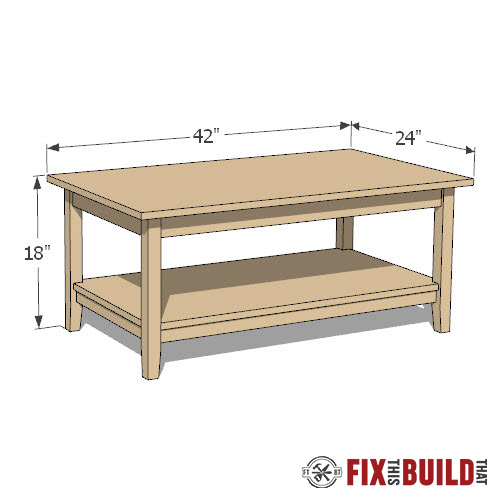
    DIY Coffee Table Plans: Build Your Own with PDF

    DIY Coffee Table Plans: Build Your Own with PDF

    DIY Coffee Table Plans: Build Your Own with PDF

    Hey there, fellow DIY enthusiasts! Are you tired of the same old boring coffee table? Do you dream of a piece of furniture that reflects your unique style and fits perfectly in your living room? Well, you're in luck! This guide will walk you through the exciting process of building your very own coffee table.

    We're going to cover everything from choosing the right materials to crafting the perfect design, and we'll even provide you with a downloadable PDF plan that includes detailed instructions and diagrams.

    Get ready to unleash your inner carpenter and let's get started!

    Why Build Your Own Coffee Table?

    Building your own coffee table is more than just a project; it's a journey of creativity and accomplishment. Here are just a few reasons why you should consider taking on this rewarding challenge:

    • Unique Style: Forget about generic store-bought furniture! You can design a table that perfectly complements your home decor and reflects your personal taste.
    • Customization: From the size and shape to the wood type and finishing touches, you'll have complete control over every detail.
    • Cost Savings: Building your own coffee table can save you a significant amount of money compared to buying one from a furniture store.
    • Sense of Accomplishment: There's nothing quite like the feeling of satisfaction that comes from creating something beautiful with your own hands.

    Choosing the Right Materials

    The materials you choose for your coffee table will play a crucial role in its overall look, durability, and cost. Here's a breakdown of popular options:

    Wood

    Wood is a classic choice for coffee tables, offering a natural beauty and a wide range of styles.

    • Hardwoods: Oak, maple, cherry, walnut, and mahogany are known for their strength, durability, and elegant grain patterns. They're a good option for a more traditional look.
    • Softwoods: Pine, cedar, and fir are more affordable and have a softer, rustic feel. They work well for farmhouse and contemporary designs.
    • Engineered Wood: Plywood, MDF, and particleboard are more budget-friendly alternatives to solid wood. While they may not be as durable, they can still create beautiful coffee tables.

    Metal

    Metal coffee tables offer a modern, industrial vibe and can be found in various finishes like stainless steel, wrought iron, and copper. They're durable and can be paired with wood for a contrasting aesthetic.

    Glass

    Glass coffee tables provide a sleek, contemporary look and create a feeling of spaciousness. They can be combined with metal or wood for a more balanced design.

    Designing Your Coffee Table

    Now comes the fun part: designing your dream coffee table! Here's a step-by-step guide to get you started:

    1. Determine the Size and Shape

    Consider the dimensions of your living room and the furniture you'll be placing around the table. A good rule of thumb is to make sure there's at least 18 inches of space around the table for comfortable movement.

    As for shape, there are endless possibilities: rectangular, square, round, oval, or even unique shapes like a hexagon or a cloud. Choose a shape that complements the style of your room and your personal preference.

    2. Select the Style

    What kind of vibe are you going for? Do you prefer a rustic farmhouse look, a sleek modern design, or something in between? Once you have a style in mind, you can start exploring different design elements:

    • Legs: Choose from traditional straight legs, tapered legs, hairpin legs, or even rustic trestle legs.
    • Top: Consider a simple top, a top with decorative edges, a top with a live edge, or a top with inlaid details.
    • Storage: Add drawers, shelves, or a hidden compartment for extra functionality.
    • Finishing Touches: Play with paint, stain, or natural finishes to create a unique look.

    3. Sketch Your Ideas

    Once you've got a clear vision of your coffee table, sketch out your design on paper. This will help you visualize the final product and identify any potential challenges. Don't worry about being a professional artist; even a rough sketch is enough to guide you through the construction process.

    The DIY Coffee Table PDF Plan

    Now, it's time to take your design to the next level! We've prepared a comprehensive DIY coffee table PDF plan that includes:

    • Detailed instructions: Step-by-step guidance with clear explanations and visuals.
    • Diagrams: Detailed drawings of the coffee table components and assembly process.
    • Material list: A list of all the necessary materials and hardware, including quantities.
    • Cutting list: Specific measurements for each piece of wood or other materials.

    This PDF plan will serve as your ultimate guide, ensuring that you have all the information you need to build your coffee table confidently.

    Building Your Coffee Table

    With your PDF plan in hand, you're ready to embark on the construction process. Here's a general overview of the steps:

    • Gather Your Materials: Make sure you have all the wood, hardware, tools, and finishing supplies ready.
    • Cut the Wood: Accurately cut all the pieces of wood according to the measurements provided in your plan.
    • Assemble the Legs: Construct the legs of your coffee table, following the instructions and diagrams in your plan.
    • Attach the Top: Attach the top to the legs, ensuring that it is securely fastened.
    • Add Finishing Touches: Sand, stain, paint, or apply a natural finish to create the desired look for your coffee table.
    • Enjoy Your Creation: Congratulations! You've built a beautiful and functional coffee table that you can be proud of.

    Tips for Success

    Here are some helpful tips to make your DIY coffee table building journey smoother:

    • Measure Twice, Cut Once: Accuracy is key when it comes to woodworking. Double-check your measurements before cutting any wood.
    • Use the Right Tools: Having the right tools for the job makes a big difference. Invest in quality tools that are appropriate for your project.
    • Take Your Time: Building a coffee table requires patience and attention to detail. Don't rush the process.
    • Seek Help if Needed: If you encounter any difficulties, don't hesitate to ask for help from a more experienced woodworker or consult online resources.

    Conclusion

    Building your own coffee table is a rewarding and achievable project that will allow you to create a beautiful and functional piece of furniture that reflects your unique style. With this guide and your PDF plan, you'll have everything you need to turn your DIY dreams into reality. So, grab your tools, get creative, and have fun building your dream coffee table!

    Happy building!

    Share:

    Search This Blog

    Powered by Blogger.

    Pages